Connecting Freshdesk
Here’s a step-by-step guide on how to connect Freshdesk to Quidget:
-
Open the Freshdesk website and sign up or log in to your account.
-
After confirming your account via email, go to your Profile Settings by clicking on your avatar in the top-right corner of the Freshdesk dashboard.

- In the profile menu, click Show API Key.

-
Copy the key — you’ll need it to connect Freshdesk to Quidget.
⚠️ Note: Keep your API Key secure. -
From your browser’s address bar, copy your Freshdesk Subdomain from the URL — it looks like:
https://{your-subdomain}.freshdesk.com -
Open the Freshdesk integration settings in the Quidget interface and click the Connect Freshdesk button.

-
In the dialog that opens, fill in the following fields:
- API Key — paste the API Key you copied earlier
- Domain — paste your Freshdesk subdomain URL, e.g.
yourcompany-name

-
Click Connect to complete the integration process.
-
After connecting Freshdesk to Quidget, you can verify or update your credentials at any time in the Credentials tab of the integration settings.
How to set up Quidget Flow to work with Freshdesk
- After successful Freshdesk integration, go to the Flow page

- Move the mouse pointer over any node and click the “+” button - Create a new node

- Click the edit button to go to the node settings
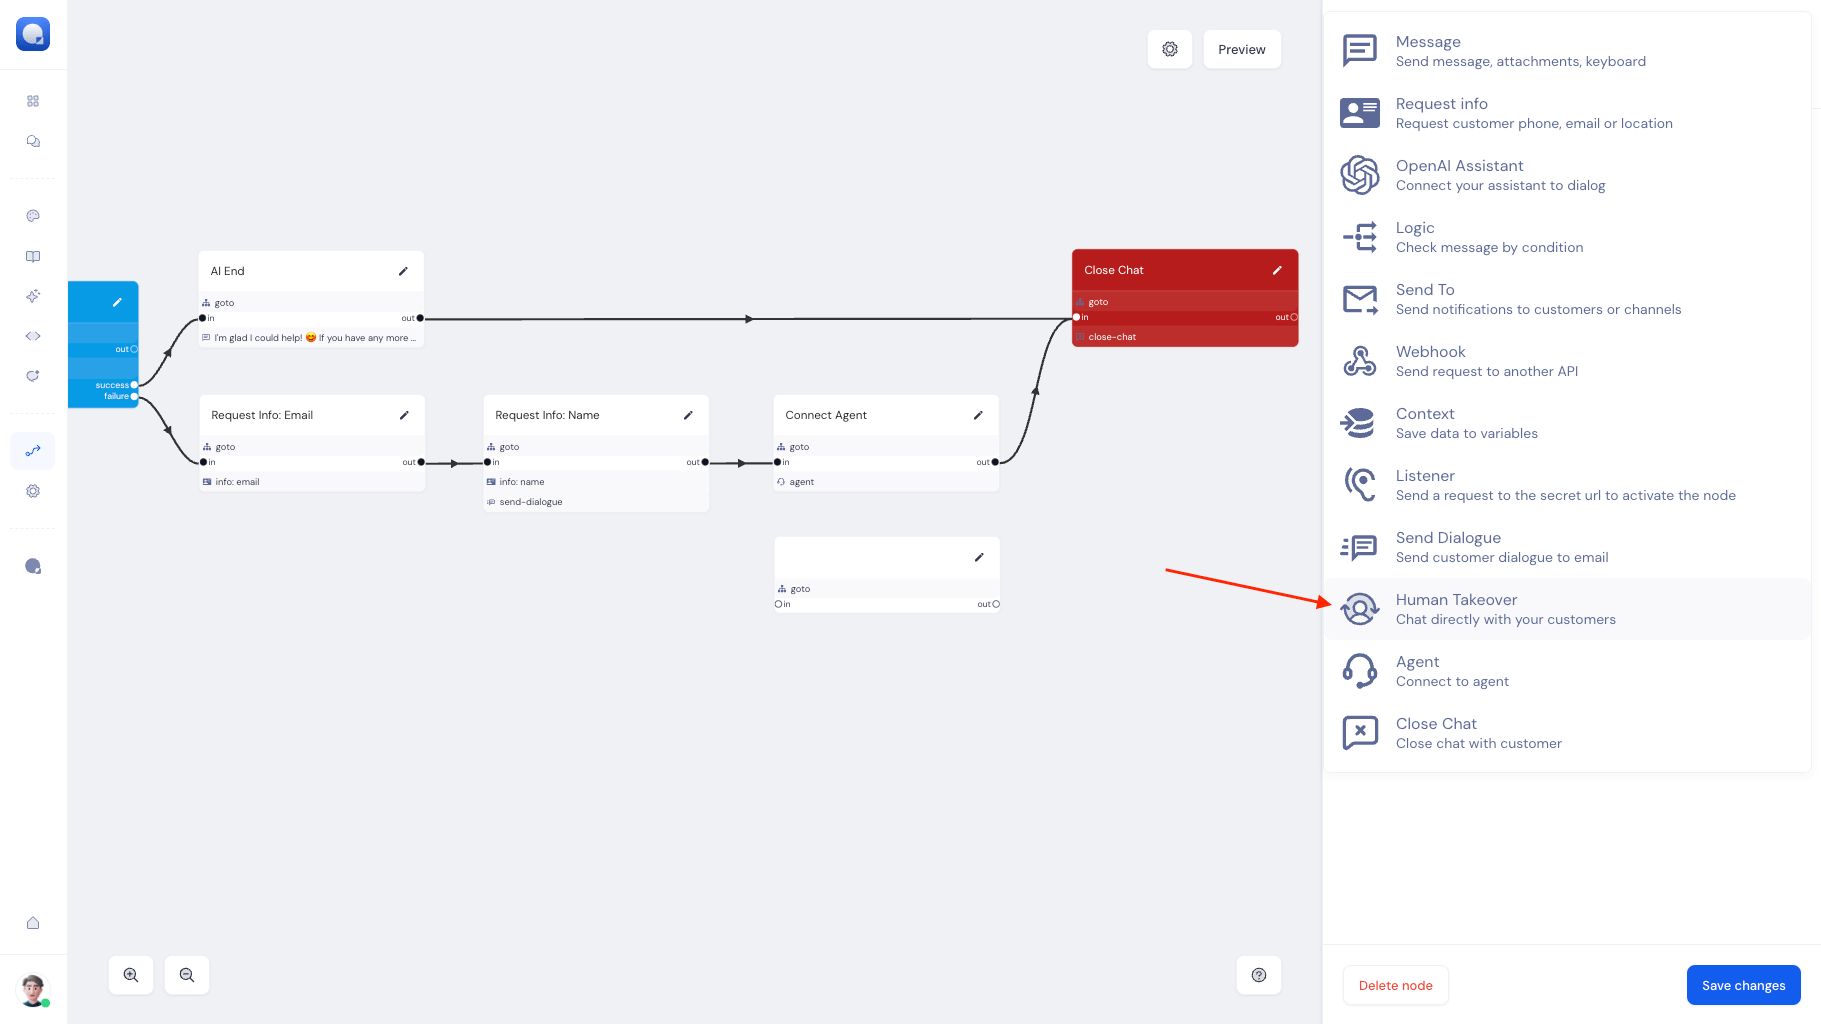
- In the open node, click on the “+ Add action” button

- From the opened action menu, select Human Takeover
- In the Human Takeover action, select the channel through which the messages should be sent

- In the Human Takeover action, in the Message field, write the text that will be shown to the customer before connecting to the agent

- Pair the created node containing the Human Takeover action with the flow you need

Once connected, your Quidget AI chatbot will be able to automatically create support tickets in Freshdesk for unresolved issues — ensuring a seamless transition between automated and human support.